Software/Zaber Console/Joystick Setup Tab
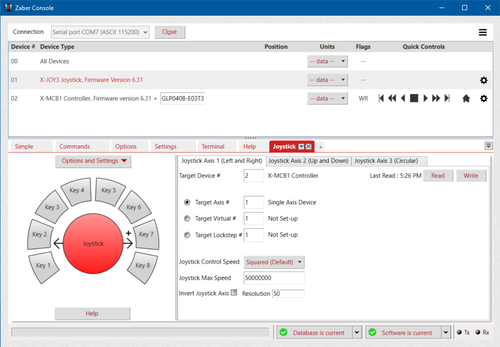
Zaber's joysticks can be used to control up to 3 axes manually; the joystick's programmable buttons can also save commands for ease of use. The Joystick tab assists users with setting up or changing these features. For more information specific to your joystick, see either the X-JOY3 product manual or the T-JOY3 product manual.
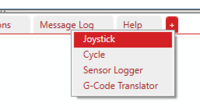
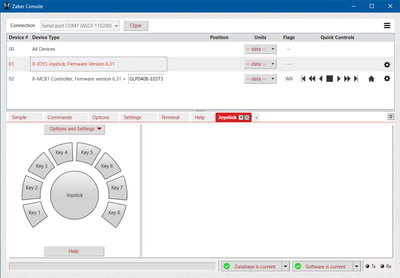
Connecting The Joystick
|
Reading and Writing
Joystick Settings
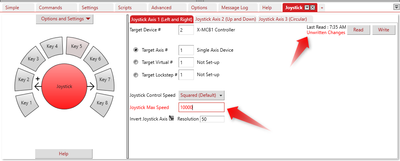
 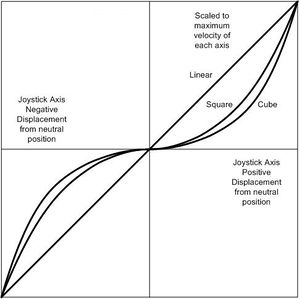 Target Device - The device number of the device you want this joystick axis to control. You can find the device numbers of each connected device from the device list. Target Axes - The axis number that you want the joystick control if the device has more than one axis. If the device has only one axis, leave this as 1. The joystick can target 3 different types of axes: a standard axis, a virtual axis, or a lockstep configuration. Virtual Axes and Lockstep configurations are only available on controllers with 2 or more axes. To make your joystick target virtual or lockstep axes, they must first be set up on the multi-axis controller. Joystick Control Speed - Controls how the velocity of the device scales with the displacement of the joystick. Options are linear, squared, or cubed. Squared and cubed have the benefit of allowing finer resolution control at lower speeds. See the graph on the right for more information. Joystick Max Speed - The maximum speed of the controlled device as the joystick is displaced all the way in a particular direction. Invert Joystick Axis - Controls how the direction of joystick displacement corresponds with the direction of the device's movement. The black "plus sign" on the arrow in the lower left indicates which direction will correspond with positive movement of the device. Resolution - This controls how sensitive the joystick is. When the resolution is higher, the joystick will be more sensitive and have a finer resolution. The maximum resolution is the lesser of Joystick Max Speed and ~500 (exact value depends on joystick calibration). |
Key Settings
Select any of the key buttons to configure the controls associated with the events of that key. The details of the key configuration differ between the ASCII and Binary protocols.
Key Events
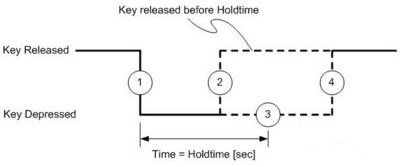 Key Protocol SpecificsWhen the joystick is in ASCII or Binary protocol, the keys may only store commands of the same protocol. Changing key commands and settings in one protocol will not affect the settings in the other.
The key commands interface in the Joystick setup tab are different depending on whether your joystick is in Binary or in ASCII. In ASCII, each key event can have more than one command. In Binary each key event can have only one command. |
ASCII Key Settings
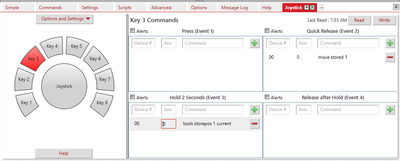 Adding and Deleting CommandsTo add commands, fill out the top row in each command grid, and then click the green plus sign or hit the "Enter" key on your keyboard. Device # - the device number for the device you wish to control. You can see this information in the top left of Zaber Console in the device list. Axis - corresponds to a specific axis if the device has more than one axis. If the device only has one axis, for example a single stage, either 0 or 1 would work. You can also leave the Axis field blank, which will make it default to 0. Command - the ASCII command you want your key to execute, e.g. "move rel 5000" or "home". You can set the "Device #" field to 0 to control all devices. Similarly, an "Axis #" field of 0 will control all axes of a device. To delete commands, simply click the red "minus sign" next to the command row. Dragging/Dropping and EditingYou can drag and drop key commands, either to adjust the order they are sent it in, or to adjust which event triggers it. Simply left-click on a key command, and drag it to the desired position. Key commands are executed sequentially, so order does matter. To edit a key command, simply left-click on the field you want to edit, and release the click instead of dragging it. The text box will become visible and editable. Be sure to save your changes by writing after editing or moving a command. AlertsJoystick keys in ASCII can be set to send alert messages back to the computer. For more information on alerts look here. To enable alerts, make sure that Alerts (comm.alert) is turned on under the Options and Settings menu on the left side of the screen. Next, click on the Alerts check box associated with the event from which you want to receive an alert message. Now when this key event is triggered, a green "Event Fired!" message will appear on the grid. |
Binary Key Settings
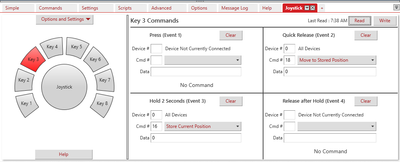 To modify the current settings of a key, simply change the desired field. Device - the device number of the device you wish to control. You can see this information on available devices in the device list. Cmd # - the Binary command's command number. For example, if you want to move a device using Move Relative, the corresponding command number, as specified in the protocol manual, is 21. Data - the data value that goes with the command. For example, if your command is Move Relative, the data field represents how far and which way your device will move. Certain commands ignore the data field completely, such as Home. To make a key press event do nothing, click the "Clear" button and save the changes. If you are using message ids, we recommend that you disable them when programming the joystick. That way the programmed instructions will work whether the target device has message ids enabled or not. Message ids are disabled by default. |
Other Features
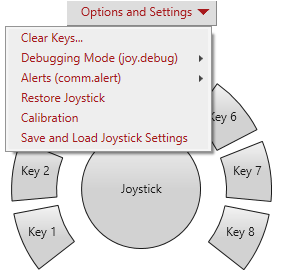  Clearing KeysTo quickly clear the key settings of all keys for the protocol you're currently using, click on "Clear Keys...". This will bring up a window asking you to confirm whether you want to remove them all.
Debugging and AlertsThe "Alerts" setting needs to be turned on for the computer to receive alerts from a key event. This setting indicates whether or not comm.alert is turned on. If the key command event's "Alerts" is checked, but the "Options and Settings" menu's "Alerts (comm.alert)" is turned off, no alerts will be sent to the computer. A yellow triangle will appear next to that key event's "Alerts" check box. The "Debugging Mode" setting allows the joystick to output special debugging messages to the message log. This setting indicates whether or not joy.debug is turned on. Restoring Default ConfigurationThis setting restores the joystick to its factory default settings, including both Binary and ASCII settings.
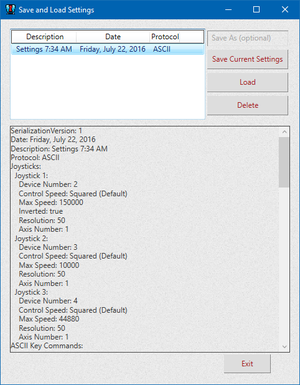
Saving and Loading Joystick SettingsThis window allows users to switch between multiple sets of configuration. To save your current settings, which include all of your joystick settings and key commands, fill in the "Save As" text box with the title for settings to be saved, and click "Save Current Settings". Click the desired saved configuration in the box and click "Load" to load these settings onto the joystick. These settings are saved on the computer, and not on the joystick itself.
Sensitivity CalibrationThis window allows users to calibrate the limits and deadbands of their joystick. The limits are the maximum deflection of the joytick in each axis that will be responsive, and the deadbands are the minimum deflections. To start calibrating, click the "Calibrate Limits" button or the "Calibrate Deadbands" button on the top left panel, and then click the "Start Calibrating" button on the bottom left panel. Follow the instructions that appear on the main panel to the right. |
