Automated Multi-Channel Imaging with Nucleus® automated microscopy platform and μManager
By Mike Fussell, Marketing Team
Published on Feb. 08, 2022
Multi-channel imaging is an essential tool for biologists exploring the relationships between discrete structures. This powerful technique can be quickly automated using the Nucleus MVR inverted microscope, and the widely used μManager and ImageJ software packages. Combining these tools provides you with a rapid and extremely cost-effective way to acquire and assemble clear and detailed publication-ready multi-channel fluorescence microscopy images.
Equipment
In this example, we will use modules from the Nucleus automated microscopy platform. Nucleus provides a complete set of interchangeable hardware modules and software tools for building your bespoke inverted or upright standalone microscope or optical subsystem.
Hardware:
- MVR100E025AC - Motorized inverted microscope.
- MLR3B-T13A - Microscope reflected illuminator (385, 3000K (white), 625 nm).
- X-LCA4 - 4-Channel LED Controller.
- FCR06C - Motorized filter cube turret.
Software:
μManager - An open-source microscopy application developed and maintained by Open Imaging which provides a common control interface for a wide range of instruments.
FIJI - An open source image processing application based on the widely used ImageJ program. The FIJI package comes bundled with all the required dependencies.
Setup
Launch μManager and locate the the Configuration Settings section of the main window (Step 1),
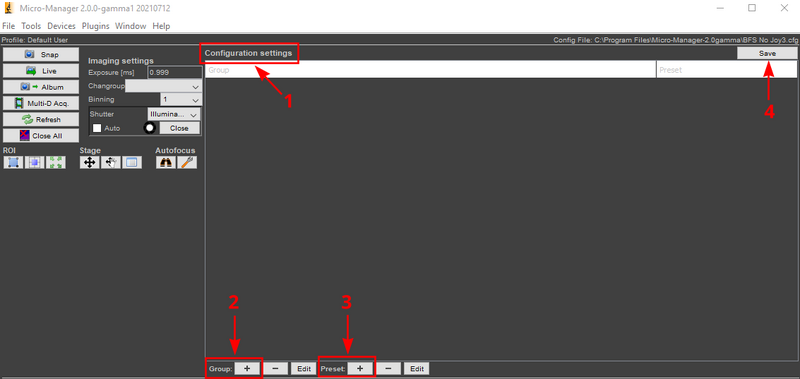
Click Group + to create a group (Step 2)
Select the Illuminator-Lamp Intensity for lamps 1-4 and FilterCubeTurrent-State. This will great the basic channel template which will consist of a filter cube and the intensity of the four illuminator channels on the X-LCA4 lighting controller.
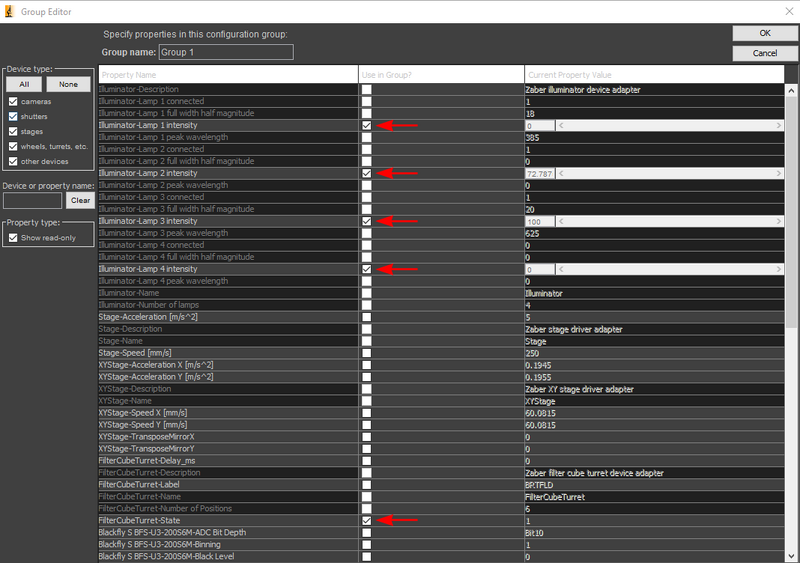
Click OK
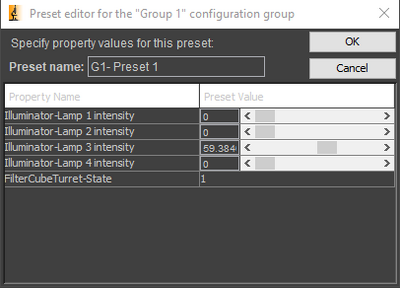
The resulting popup window will enable you to create the first channel by selecting the associated illumination and filter cube settings. These will ensure the appropriate LED lamp is illuminated and the correct filter cube is in place for the fluorophore you wish to image.
Once you have entered your desired filter cube and lamp setting, click OK . This will close the window.
To add additional presets for more channels, Click the Preset + (step 3) button and repeat the above steps for the next fluorophore. Once you have created presets for each fluorophore, click Save (step 4).
Image Acquisition
Select Channels to enable multi-channel acquisition
Click New to add the configurations that will be cycled through for each position.
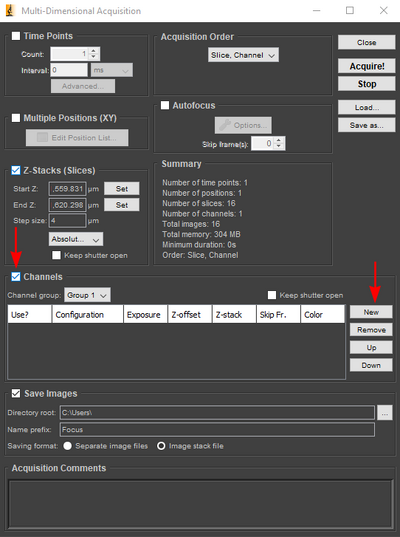
Exposure adjustment for each channel enables individual channels to be optimized based on the intensity of their fluorescence signals.

Click Acquire! Your images will be acquired as a .tiff image stack. This format contains all images bundled into a single file.
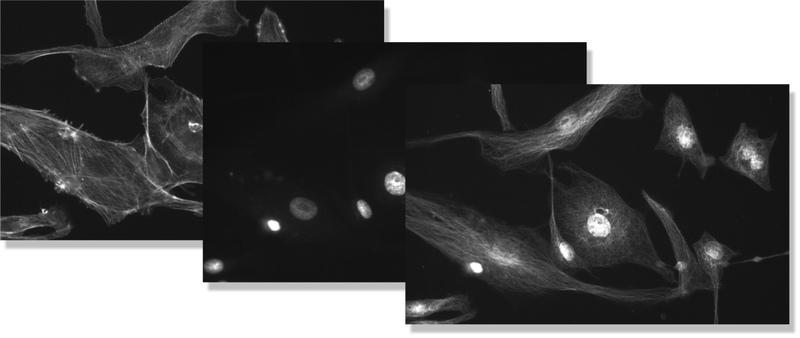
Image Processing
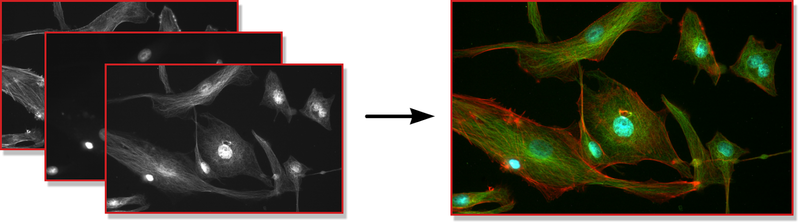
Processing in ImageJ is required to convert a stack of monochrome single-channel images into a single color composite image.
Open your image stack using the file menu
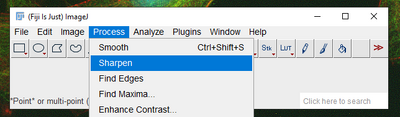
Select Image > Color > Make Composite
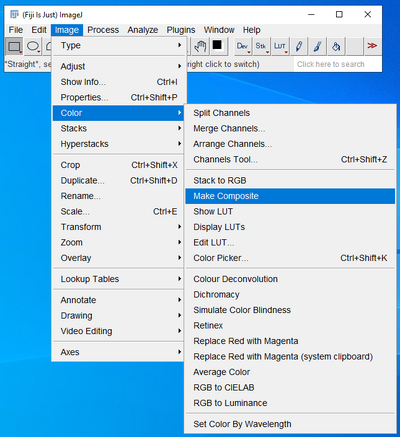
The resulting image will be a composite of the single-channel images in the original stack.
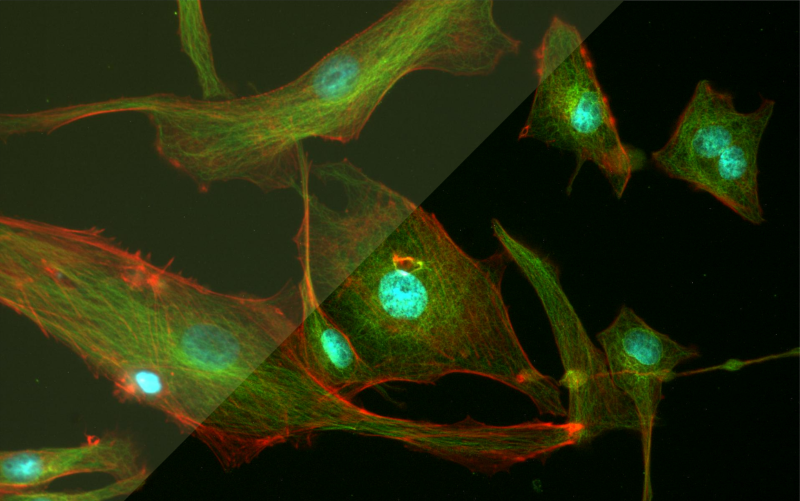
Additional quick adjustments of the initial image (left) can optimize images (right) for display and print. Brightness and contrast settings are useful for setting the appropriate background black level. To switch between adjustments of individual channels, use the scroll bar at the bottom of the image display. Individually adjusting the parameters of each channel can be helpful in optimizing the image, particularly for channels with lower intensity.
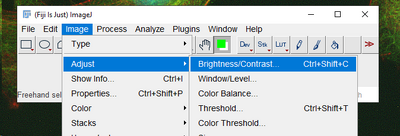
The Sharpen function can improve the rendering of fine details.
Basic adjustments can greatly improve an image's clarity. The upper left side of the following image is the initial output. The lower right side has had brightness, contrast, and sharpening corrections applied.
Once you are happy with your image click File > Save As to save a copy of the processed composite image.