Joystick Quick Set-Up
Installing the X-JOY3 is as easy as 1, 2, 3.
STEP 1
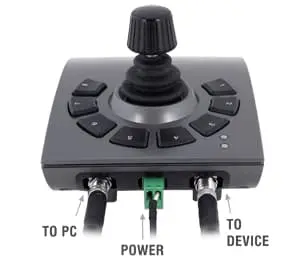
Connect the X-JOY3 to your computer via USB or RS-232 port using the cables included if you ordered an accessory kit.

STEP 2
Connect the joystick to the Zaber device or controller of your choice, and plug in the power supply included if you ordered an accessory kit.
Zaber's X-Series devices can daisy-chain power to other X-Series devices.
STEP 3
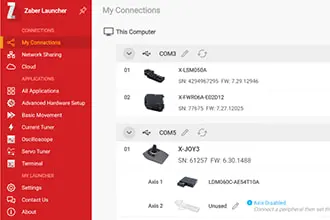
Send instructions to your set-up using Zaber Launcher, our free, open-source software, or write your own application using Zaber Motion Library in your preferred programming language.
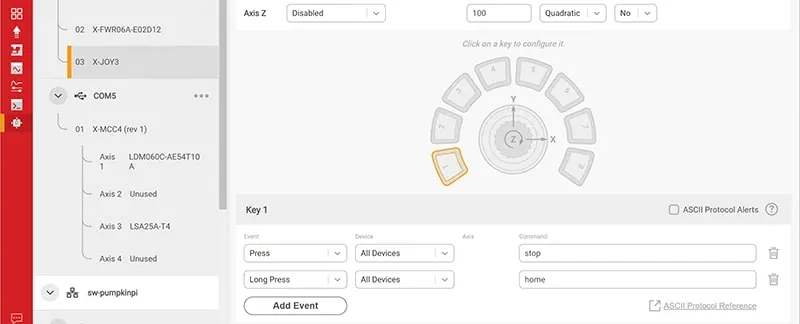
Programmable Keys
All the buttons on the joystick are fully programmable. For more information specific to your joystick, see the X-JOY3 product manual. The X-Series joystick can also be configured with Zaber Launcher's "X-JOY app".
Daisy-Chaining Additional Units
Additional units can be easily installed by daisy-chaining them to the first device. Power can be shared through the data cable with some Zaber products. Mix and match any devices (linear, rotary, and tilt) to customize your set-up. The joystick can control up to three axes simultaneously.
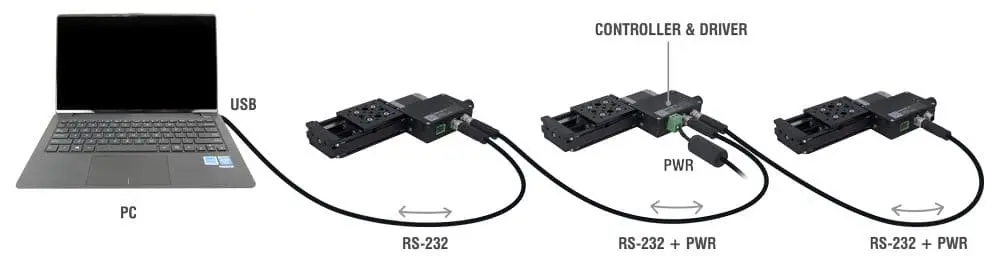
Note: Data connector type between any of Zaber's motorized devices may be M8 (shown), D-sub, or mini-DIN style depending on the devices that you purchased.
For detailed instructions on setting up a specific product, browse or search to find the product of interest and check the "Support & Drawings" tab for the product manual, our Getting Started Guide, and other useful information.